


Tips on Photographing a Glacier
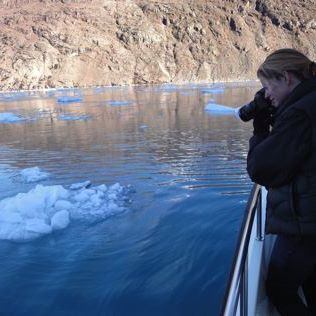 Whether it’s a ski vacation or an expedition to the Arctic—or
even just a trip to the local park on a wintery day—ice and snow provide
dramatic subject matter for unforgettable vacation photos.
But successfully capturing their icy beauty can be a challenge.
Teril Lindquist Turner sat down with photographer Tracey Kirkland to get her
tips on successful Arctic photography.
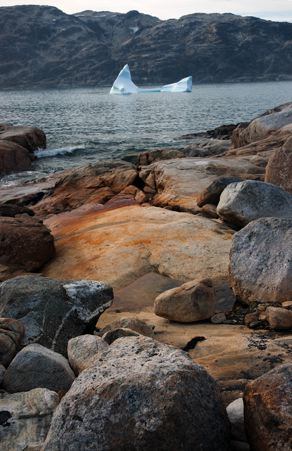
Then, don’t miss the spectacular gallery from Kayla Lindquist from their journey
to Greenland.
According to Sydney, Australia-based photographer Tracey Kirkland, the problem
starts with reflections off snowy surfaces, which the camera reads as an excess
of light.
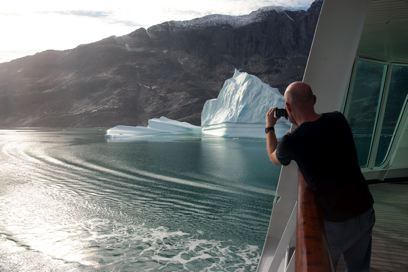
Kirkland fuels her passion for travel with assignments for clients around the
globe as well as personal journeys with her husband and children. We caught up
with Tracey on her recent assignment as official photographer and videographer
on Hurtigruten’s 14-day “In The Wake Of The Vikings” trip
to Greenland and Canada, where she shared her favorite professional tips and
tricks for creating extraordinary images of ice and snow:
Click here to view Part Two of Greenland’s Glaciers
Slideshow.
1. “I want to take a photo of my friend near an icy white glacier. How
can I make sure both she and the ice look great?”
 Light can be your biggest friend and your greatest enemy in
the Arctic. It reflects off everything—the ice, the water, the clouds. This can
trick your camera sensor, which has the important job of reading the amount of
light your camera is receiving. Opening up a stop or two will help make sure you
expose the subject rather than the ice. Saying that, the main problem with
standing someone in front of a reflective surface like a glacier will probably
be back light. To avoid this, either keep the sun behind you (the photographer)
or use a flash.
2. “If I see an Arctic animal on the ice, how do I make sure the animal
doesn’t get lost in the photo and the ice still looks beautiful?”
If you’re lucky enough to come across an animal like a penguin or a seal, I
wouldn’t worry too much about capturing the ice. Make the animal the main focus
and eliminate as much unwanted background as possible. If the animal is moving,
increase your shutter speed for a sharper shot. You might like to try increasing
your depth of field (by opening up your aperture) to blur the background. Unless
there is something nearby you want to capture in the shot, crop as close as you
can. If you see a whale, try taking fast, multiple shots.
3. “Are there any camera accessories that would help my photography in
the Arctic?”
Yes. A zoom lens is best as it gives you ultimate flexibility. An 18-200mm is my
most prized possession, although you can go much longer. It will mean you can
get up close for your animal shots and go wide for the landscapes without having
to change your lens in wet conditions. A lens hood is recommended to stop
unwanted light entering your camera. A tripod is always a worthwhile asset. And
plenty of extra batteries are essential. Batteries lose their power much quicker
in cold conditions.
 4. “What if it starts to snow? Can I still keep shooting?”
In many conditions you can, but try to stand under some kind of shelter (an
umbrella) while you shoot. It’s really important you protect your camera from
too much water. When you do shoot, try turning on your flash as it highlights
the snowflakes.
5. “Are there any general tips you can give me to help me take great
photos of Arctic landscapes?”
Taking great Arctic landscape shots is the same as taking great scenery shots
anywhere. Rule number one: Make sure your horizon is straight! Look for
something interesting to include in the foreground. Make the most of reflections
and lines. See if you can frame your photo using trees, buildings, or rocky
outcrops. And employ the rule of thirds, where you break your photo into three,
similarly sized sections. Once you’ve done all that, feel free to break all the
rules. And have fun!
To see more of Tracey Kirkland’s images, visit www.zestmedia.net.
By Teril Lindquist Turner for PeterGreenberg.com. Photos by Kayla Lindquist.
Related links on PeterGreenberg.com: